Sunday, August 21, 2011

Simple Wedding Dress

I was asked if I'd be willing to make a "simple" wedding dress. Now let's just clarify something right away. I believed them when they said it. A good friend of mine who has made quite a number of wedding dresses called out a warning before I met with the bride and mother, "beware if they use the word SIMPLE". All of a sudden I was a bit stressed. There wasn't going to be time before the wedding to have anything other than simple.
After meeting with the Bride and Mom I decided it would be simple. But with a simple gown other things have to be so "right". The fabric, fit and execution. But really how hard could it be? After discussion a decision was made for an empire waist, short cappish sleeves, and full length BIAS skirt. That's it.
I was pushing for some silk charmeuse just for the luxury and beauty of it, lining it with habotai. I knew with this simplicity the fabric would have to be very nice. I gave her a couple of samples 5"x5", but it wasn't convincing until she spied a large scrap of white silk charmeuse on my sewing table I had been running sample stitching on. I let her take it with her to JoAnn's. :~)   You know she called me right away from JoAnn's stating she couldn't find anything she liked.
A great place to order beautiful white silks is http://www.silkconnection.com/   or  http://www.dharmatrading.com/
Both of these resources have terrific customer service and I have had wonderful experiences with both. Now that I live less then 100 miles of both of them I receive my  packages within two days of ordering. I have been ordering from both of these places for about 15 years now and even at a further distance the service was perfect. A lot of seamstresses don't know about these sources unless they are into surface design. They are selling to the fabric artist. But so much more economical for white silks, linens and cottons. Check out what other things they have you might like. You may decide to do some surface design.

I was able to help this little gal get beautiful silk for her wedding dress at a cost comparable to the polyesters at a place like JoAnns. I have to say I enjoy so much working with fine fabrics. But some problems arose and I again questioned wether or not I want to custom sew for people. I find it extremely stressful. l want everything to be so perfect. There were problems with the bias skirt, the fit of the sleeves, the darts, oh my goodness the darts. I thought I was going to die before getting them looking nice. If I had followed the balanced dart technique to start with a lot of misery could have been spared. These problems became huge before being resolved and I have definitely learned a few things. That is the best learning....to learn by doing and I always seem to learn more from making the mistake first.  UGH!! It feels so hard at times.

Here is the finished dress.


Here is the front inside bodice lining.

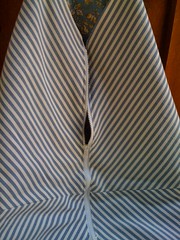
 The back bodice lining.


 Hand rolled hem.


   It turned out quite lovely. But I have decided that garments look best on a person and I need to maybe use my real camera instead of my phone. I also need to figure out how to give finished garments a better press. Or maybe that is one thing I take to the cleaners. I do meticulous pressing as I sew, but when the garment is finished and it is a dress or larger inclosed garment, I find it harder to get that final press to look really nice?  I also drafted the pattern myself.
  The bride added her own embellished sash as she wanted to do something special for the gown herself.

Construction details:

Bodice
I used a very lightweight fusible interfacing on the WS of the entire bodice to give more body to the charmeuse fabric. I fused the interfacing to a block of fabric before cutting out the bodice. Darts in this fabric without the interfacing was not doable. I also used the balanced dart technique  Lynda Maynard uses in her book, The Dressmaker's Handbook of Couture Sewing Techniques. Available from Amazon. I highly recommend this book for anyone hoping to gain a more professional finished garment. It may be couture but you can do it following these easy to understand instructions. The book is beautiful.

Bias Skirt
I looked up ways to handle charmeuse on the bias and found the recommendation (I followed) was to cut the skirt out adding an inch to two inches on all seam allowances and stitch up with a long stitch. Let the skirt hang for a minimum of 24 hrs. Take out the stitching and recut the skirt. I followed this for both the lining and fashion fabric. The width I must tell you grew quite a lot.  I ended up taking out more than I expected on the side seams in the back so it would drape properly. My suggestion to others is to follow what the fabric tells you to do! I would have saved a lot of ripping out seams if I had listened to my instinct the first time when I went to attach the skirt to bodice. I didn't think the back skirt could have possibly grown as much as it did in width.  I eased it into the bodice which resulted in very poor draping.  I had to rip out the bodice to skirt seam as well as the side seam and cut off more width.

Invisible Zipper
I cannot figure out why people have such a hard time with invisible zips. I have loved them for close to twenty years once I realized they always look great. I suppose I got lucky in the application technique when I followed the packaging instructions precisely. They just have always worked so much easier for me. ??? I have learned a couple of new tricks though. One big one is to interface the seam allowance where the zip is to be placed. The second is to use Dritz "Wonder Tape". It is located on the notions wall at JoAnn's. I buy it when the items on the notions wall are half price. It is a double sided tape 1/4" wide and washes away when washed. I also found an article in Threads which  demonstrated how to achieve a gorgeous looking neckline where the zip is installed. Now that I am posting about it I can't located the article. Sorry. If I find it I'll post it.

Hand Stitched Rolled Hem
I googled how to hand stitch a rolled hem in silk charmeuse. And found this http://www.coletterie.com/tutorials-tips-tricks/tutorial-how-to-create-a-hand-rolled-hem
I followed the tutorial. I'm thinking about how much I love tutorials and how appreciative I am for those who post them.
It occurs to me that I might want to help others in posting my own for things I have discovered tricks for. I'll let you know when I get one done.

Sleeves on the bias.
To create this sleeve to move more with the bride as she hugs and dances I put it on the bias. I also put the lining on the bias and stitched the two together at the hem line with a tiny zigzag for more ease and comfort. I inserted the sleeves as one into the armhole and stitched in the usual manner. I wanted the entire gown to have a clean finish. So I made some bias tape from the habotai lining fabric and applied it to the seam encasing all the raw edges.

Sunday, August 7, 2011

"Mother of the Groom" dress from Moulage


A friend of mine called a few months ago and wanted me to make her a dress for her son's wedding. I'll leave out all the crazy things that happened that almost made it impossible.  I started out measuring her for a moulage. (see earlier post about moulage) when I got the muslin made and fitted she was so amazed at the fit. She couldn't believe it. She was also my first real life test other than myself of using this method. I was so excited to discover that I could actually take a piece of blank paper and measurements, and custom fit a victim. After making a moulage I took the pattern to sloper and then drafted the pattern for her dress. The dress is a two piece look with the skirt attached to the lining. It has princess seaming and raglan sleeves. The dress is very slimming on her figure. The third photo shows the lace  with the rosette close up. I realize that I didn't get a photo of the lace detail finish. This first photo is not the finished lace. I also changed how the lace sits on the sleeve before it was done. 
The dress is made from poly crepe in a light sage green with beautiful champagne colored lace at the neck line and sleeve. The green crepe fabric was purchased at Discount Fabric in San Francisco (don't let the name fool you) and the lace was purchased at Britex also in the city. Yes the dress does need a final pressing. She will be traveling and consequently be doing it at her destination. If I get a chance to get a photo at the local reception I will post it. 


Wednesday, July 27, 2011

A Pretty Blue Coat - Threads


I just love this little article about details in this jacket. I think it would be fun to consider and use some creative ideas like this to add interest to our own sewn fashions.


A Pretty Blue Coat - Threads

Monday, July 25, 2011

MOULAGE or fitting the French way

vThis past spring I took a moulage class from Lynda Maynard at Canada College in Redwood city.

A moulage is the beginning of a sloper. It is a  "sausage" casing for your torso as Lynda calls it. It is the precursor to a sloper. It is taken from your actual measurements and put to paper. The ultimate of fitting can be obtained quickly using this method. Lynda Maynard and Kenneth King are good friends so it was only appropriate we use Kenneth's book on CD to learn this technique.  Here is the link to order one for yourself.  http://www.kennethdking.com/httpwww.kennethdking.combook3.html#moulage
I highly recommend trying it out. You will be amazed as everyone who took the class was at how close everyone was to having a fitting sloper in flat pattern. The moulages were done in muslin and were fitted. A second moulage was sometimes needed but quickly made. Then we took the moulage to sloper and made a muslin. By the end of class we each had made a basic sloper pattern. If you've ever wanted to conquer the fitting challenge I recommend Kenneth's CD.  You can have your CD made into a hard copy very easily at Kinko's.

Sunday, July 11, 2010

Pyramid Bag


I have to say when I ran into a photo of this bag here: http://www.flickr.com/photos/8219451@N07/4357065237/  I hurriedly found the pattern and purchased it.  Most of what I have to say about this pattern is found here....http://www.noile.net/2010/05/hot-patterns-1092-nouveau-pyramid/
 I COULD NOT figure out parts of the pattern instructions. The shape looks adorable in the sketch. Besides the pattern and instructions being poorly written the bag is poorly executed for actual usage. I will be adding a couple of extra seems to make my bag a bag. I also put in a double ended zipper due to the size of the bag, thinking it would be useful to zip from either end. Eh, Not so much. But I can't figure out either, how the bag could be used with a one ended zipper. I am an experienced seamstress. I have to admit that bags are not the thing I sew a lot of. But believe me when I say I can navigate most anything I really want to sew. But this pattern is inadequate on both levels, the written words and the sketches. I applaud the independent pattern makers and do support them. I like to support them and am even thinking of starting a pattern business of my own. But I hope my pattern testers would stop me before letting something like this out the door.
At any rate here are my photos. I printed the flowers onto the finished bag to give it some more color. It looks so cute. Hopefully the bag will also be usable after some extra stitching.


Pyramid Bag


Pyramid Bag


Wednesday, April 14, 2010

I actually have been sewing

So something happens to me when I get going creatively. I just go. I don't actually forget that I would like to write in my blog, I just can't seem to get my brain to go there with me. I will look at it and see the same photo on top and think, "I really should update that". And I go on, in this case drafting patterns. I drafted a fabulous skirt that I gave to my sister-in-law for christmas. I had my brother's family to give a gift to.  I was sewing and my sweet SIL wanted something Original from me. So she got the gift. The whole gift. The other family members get to see her happily wearing the family gift. Here is the link to my flicker account with the few things I had just finished up along with Amy's skirt.

http://www.flickr.com/photos/musedtexture/sets/72157623498189353/

I also made a couple of darling dresses for my granddaughter who is 4 1/2. She loves dresses and loves pink. Here is the link to those pictures. So sorry I'm not on the computer that has the photos. Darn. But I decided it was better to write and update a bit while I am willing and feeling the grove to do so.

http://www.flickr.com/photos/musedtexture/sets/72157623496728481/

See if you can figure out which dress was made from a piece of "ugly" fabric I had on hand. I am taking a designer techniques class at Canada College fashion dept. and got the inspiration to use that piece of fabric for a dress. Before this class I couldn't imagine ever taking the fabric and having something come out so darling with it. I learned to make the collar, easy BTW, and then inspired by pockets made the pockets out of matching collar fabric. My granddaughter LOVES it as did I. My daughter has issue with the pink and blue gauze dress because of the added rick rack. I happen to think the rick rack adds to the otherwise somewhat boring dress. What is your opinion? Do you add things into your sewing projects that take them from ordinary to extraordinary? Next post I'll put up pictures of my mobius band scarf that I knitted while I needed a few days break from making a princess seam pattern for myself. It can become tedious when trying to get fitting correct and having to remake several muslins. The end result it worth the time - just getting there can be exhausting. I'll also post pictures of my first project I made for my techniques class from a self drafted pattern as well.

Saturday, January 16, 2010

I had a personal panty party!!

Remember I told you I had taken a lingerie construction class last semester? Well, here are some examples of what I learned to do. They are so fun to make and very easy! So the other day I made these...


Le Fred's Clio pattern

My new favorite ready made pattern is the Clio blouse from Le Fred. http://www.lafred.com/store_product_info.php?id=502

This is my first one made directly from the envelope with a linen/rayon fabric as suggested.


Here is my crepe de chine version. I took out the center seams and made the skirt fabric from pin-tucking it. I also like this fabric with the one layered underneath the skirt.  I also wanted a v neck and wanted a more flowy drape.

I also added a lightweight stretchy elastic across the back bodice seam for more waist shaping. It's not the best photo. I took it after wearing without pressing it.


Now I wanted to try it with a cowl neck. The first one below is a polyester chiffon. This final version is some silk chiffon, two layered skirts with the top skirt shorter. It is lined with silk charmeuse. I LOVE this pattern and have several more ideas for manipulating it with even more fabric types. 


Thanks Fred for your great "Clio" pattern!!
For more photos including the backs of these check out my flicker site.

I have been away

I have been sewing actually quite a lot in the past few months. But because I have been taking classes at Canada college in their fashion department, (http://canadacollege.net/fashion/) I haven't made time for postings. My classes this past semester were not intuitive for me making them much more time consuming. I was taking "Techniques of Fit" and "Advanced Flat pattern". I also took a short class on lingerie construction only lasting a few weeks and was easy fun play time. I did take many photos of things I've been working on and those are posted on my flicker account http://www.flickr.com/photos/musedtexture/sets I think you will still find it fun to look at even though I decided not to try to play catch up.

The very exciting thing from the Fit class is that I now know how to fit people and have a sloper for fitting myself. Did you realize that it is not a blob of fat or a boney figure you have there but a figure variation? Every part of your body is in some way a body variation. We all have them, not one single person is exempt. And yet we wonder why we can't buy a pattern or a piece of clothing and really have it fit. No two bodies are the same. No article of clothing by its nature can fit every figure type. And sizes, let's not get started on the mystery of the number. People want to buy the smallest number they possibly can. Just yesterday I saw a personal shopper talking about size. She stated that she has been with women who will buy things that don't fit well because they wanted the smaller size. Clothing will look so much more attractive and complementary when it FITS. This woman also said that all women should have a good, trusted alteration person so they get the best fit. Let's be honest here it simply isn't in everyone's budget. But you can buy clothes that fit and are attractive no matter what your purchasing budget is.  I know I've been guilty of trying to squeeze into the smaller size also.....I hope to be doing better as I am more educated.

Advanced pattern was my favorite class. I feel like I could spend a full year at least in this class. We took slopers and developed patterns from them for woven fabrics. We tested patterns in full scale to make sure we were developing the patterns correctly. For our midterm we were given line drawings of fashions and then made the patterns without notes. I was successful but I will say that in real life I will  be happy to have reference material available to me.
 I skipped over the beginning pattern class. Doing so was good and bad. Bad because I had to come up to speed. Good because I was challenged and was able to learn more. It took me quite a few hours to complete my homework each week as I wanted to make sure it was done correctly and I was very particular about my pattern drafts. For my final original garment I was able to use my completed sloper (from the fit class) to create an outfit for myself. Between the fit and pattern class I think I will no longer be able to buy off the rack again. (except knits) During the semester I had purchased a very lovely silk charmeuse blouse. When I tried it on there was plenty of fabric but the fit was all wrong. Before this class I would have just thought, " well, it's not great but I don't know why and it does go around me." Now I know why, all those figure variations that the original pattern wasn't designed for. Patterns are designed for the "ideal" figure which I learned doesn't even really exist. I have a new found respect for the runway models, they can't eat and fit into those clothes. The industry does need to change in this regard.

I'll work on posting more about the things I'm doing as I do them. School starts back up this Thursday for me. I am ready to get back to it.

Monday, August 3, 2009

Tailored Jacket

I managed to get my SIL to take a picture of my jacket. After working on it for several months, it is ready for fall weather. It is the Sewing Workshop pattern, " San Diego Jacket".Take a look at the great lining. That along with the lime green button made the jacket an exciting article of clothing. I always have to have some fun element in my work, in this project the button and lining gave it the fun it so needed. The buttonholes are bound button holes and the pockets are outside welt pockets. It is interesting to me to see this pattern made up several times and not one of them looks like the others. When personality is added the same pattern is unrecognizable from jacket to jacket.
My SIL has a much better camera than I do. She also took pictures of my finished quilt. These look a bit better than my photos.

Tuesday, July 14, 2009

Finished Quilts

I had promised my dear sister that if she purchased fabric for a quilt that I would make her one. I went ahead and found this fabric in her color choices, it was so gorgeous I knew it was the one that not only I would enjoy making but she would enjoy receiving. She may have been a bit anxious for me to get this done for her, after all she was trying to redecorate her bedroom and who doesn't want things right now? I'd get anxious too. However the process of putting one like this together is more complicated than the baby quilt shown below and much, much larger. This finished king size quilt made to come down the edges of the mattress to the box springs measures 102"x110". It weighed in at a whopping 14 pounds. I managed to quilt this on my Juki TL98E. The first generation of these sewing machines. I'm not sure how I got it moved around by myself to quilt it. I also managed to baste this by moving all my furniture in my living room off to the side and by using the basting spray. Again somehow managed alone. I love this newer innovation. The basting spray makes the actual quilting very nice as you don't need to work around safety pins and there is no need to pull out basting stitches. I think my sister will be very happy with the end result of this quilt and find it worth the wait of a year.
My nephew and his wife are very nice people. They have the sweetest little boy and last week added to the family a darling baby girl. I hope they enjoy and use this quilt. It is made from Moda flannel. It is lovely to touch and sit with. I think the baby will like it.
This is what some of us may think of as cheating in that Moda sells the fabrics of each line in sample squares. One each of the fabrics per sample pack. I purchased two of these packs and a bit more fabric off the bolt for borders and backing. What's wonderful about it is that you get a beautiful quilt that is simple and easy to sew up. When you want a lovely gift quilt but happen to be short on time this is a great alternative to more complex blocks, and every bit as nice. The gift recipient of such a quilt doesn't feel at all slighted, nor do you want them to, you do love them. This little gem is about 40"x40". I find anything larger than that overwhelms the tiny baby and it is still plenty big enough for the child to use while growing.
It's been fun to get some quilting done in between apparel items. However, I'm not sure how long it would have taken without the gentle pestering of , "how is my quilt coming?". These days I'm much more into the design and construction of clothes, the dream of my actual childhood having been reborn.

Good Friends

I have quite a few good friends. I feel very fortunate to be surrounded by fun, kind and loving people. I have one friend that I sew with quite a bit. She was my first sewing buddy after moving to California four years ago. She likes to make things for her friends. Now, I know what you are thinking. And you'd be right I am lucky! Let me show you the very useful items she has made for me. And may I just say one of these projects is not for the faint of heart. I think you'll know which one.


I know that little project was not an easy one and I don't think she'll be quick to make another one any time soon. But, isn't it just fabulous. I can just grab this tote when I am going to be sewing in some location other than my home or even at home, I know just where things are!
She also made me both of these other gems. Both trash collectors, one for use with my serger as a catcher and one with a pin cushion to set next to my sewing machines. I don't what I did to have such a friend but I'm very happy to have her as one. I wish for you all happy sewing with good friends all around.


Friday, June 5, 2009

Swimming Suit Season

I was lucky enough to have taken a swimming suit workshop. There sure is a lot more to making suits then I imagined. MaryJane is a professional swimsuit designer. Those of us in her workshop had a great time. We enjoyed learning how sew and size swimming suits. I hope my granddaughter will get lots of wear from these two suits. Next I'll be making one for myself. I have the suit cut out and ready to go. I'm just waiting for the bra insert to come in.


Monday, May 11, 2009

Today I spent a few minutes making this cute little dress for my grand daughter. It is very simple and since she lives in Arizona I think it's perfect.

Sunday, May 10, 2009

Patternless sewing

The July  Threads magazine has an article about sewing a bias topper from two squares. I just adore patternless sewing and always find it enjoyable. I purchased the magazine friday afternoon after going with my DH to see the new Star Trek movie. A must see btw, even if you are like me and not totally a sci fi geek, it is very good. I was tearing in the first five minutes of it. Back to sewing. Two squares one large and one small. Now, you do have to go back to your basic algebra to figure the size of squares. I tell my 14 yr old DS that math does apply in every day but he still is not sure he believes me. Well, believe me you need to remember that a triangle is A^2+B^2=C^2.  and then since two sides are equal you need to know that 2x A^2=C^2. I know this stuff so I can figure out my square sizes. Anyway, go now and  buy the issue of Threads and make yourself a topper. I'll admit here that I did have to make it twice. The first one was looking very cute until I decided I wanted a larger neck opening. Then I attempted to repair the gapposis and let's just say it turned UGLY!! I decided not to despair and tried again remembering my mistake. So here is my version. 

I made this one with a beautiful poly crepe purchased in the remnant department at Britex in San Francisco. I've had this beautiful fabric for a couple of years and finally decided to use it. I'm in the mood for a gorgeous pink. It must be spring! 

Saturday, May 9, 2009

Vogue 1113

I was lucky enough last week to make a JoAnn's run for vogue patterns at $3.99. WOO HOO!! I first went to a super store and found this fabulous new pattern. I wanted it in both size ranges and so went to another store to get the other size. When I got there it wasn't listed in the pattern book. I was confused and then realized this pattern must be a brand new one. I flagged down a salesclerk and had her check the back room for patterns still in the box. Sure enough, they hadn't put them out yet. I think this is a fabulous pattern!! I love the geometric quirky things. When I finished sewing the jacket, the button I was thinking of using didn't seem right. I thought about this vintage brooch and it is perfect! 

Tuesday, May 5, 2009

I've been holding out


Yes, it's true I have been holding out. I have been sewing and not blogging about it. :( I have finished a quilt top for my sister.
the quilt is not quilted. However if you would like to see the quilt in process there are more pictures here: http://www.flickr.com/photos/musedtexture/sets/72157617745607828/

New Fabric from Josephine's


If you happen to be driving through Portland Oregon, you may want to consider stopping in at Josephine's Dry Goods. It is a VERY lovely higher end fabric store that is just a joy to be in.  My DH is the best. He planned our trip with a stop for the night in Portland so I could indulge. How many husbands are willing to not just let you spend two quick minutes in a nice fabric store but plan your overnight you could spend a couple of hours if wanted? WOW. I only purchased three pieces of fabric.


This is a beautiful brown italian linen with  a lighter color mixed in and the black is a bamboo woven fabric that feels very much like a nice rayon challis. 
It's  a little hard to tell but the printed fabric is a wonderful japanese made double cotton gauze fabric. It is a two layer fabric with what looks like small stitching holding it together, visible from the wrong side.

We did have a wonderful trip and were able to spend time with my MIL and SIL and have a few days on San Juan island as a highlight. Next year we are hoping that my wonderful SIL will be able to come to the island with us. Here is a pic of our favorite place.  the top pic is our favorite place. I'm still figuring out how to get the pictures where i want them?? Have a great sewing day!!

Friday, March 27, 2009

My sewing story

OH, there aren't to many people that can say sewing is their passion. Here's what I'll say... my dm says that she was glad I was the youngest because when the other kids were at school (I'm the youngest of 6) and she didn't know what to do with me for the afternoon she would give me a bag of scrap fabric and I'd be happy all day long. That is how much it is in my blood! My oldest sister (who is the oldest) was a great seamstress. When she was in high school she would make these wonderful dresses out of much funner fabric than my DM would ever use. For some reason she wouldn't volunteer her scraps. I had to dig them out of the garbage. It use to make her so mad But they were just too fabulous to stay in the trash and my dolls really needed them. I also would pull up a chair next to my mom when she was sewing and just watch. I sewed all my clothes in high school and college and through 5 years of single parenting.

My life dream as a child was to be a fashion designer. I have parents who didn't know how to help you achieve your dream. I ended up getting a Fashion Merchandising AS degree from LDS Business college.
 I loved working retail but after marrying young, having a baby, and becoming a single parent. Retail was just not going to work. I worked for a clothing manufacturer sewing garments and then also working in the warehouse. I worked for them for 5 years. I decided I needed a much more lucrative career. I went back to college at the U of U. Just a couple of weeks before I started classes my DH and I started dating. I ended up getting married again and staying home with my then 6 yr old DD. I also gained weight, was home for the first time as a parent.
 Sewing for myself wasn't as easy anymore and I started watching Eleanor Burns on PBS. This was back in 1992. So this started a 15 yr love affair with quilting, and I have to say I am very good at it. It came very naturally to me. I could figure everything out and retain information from classes like I was meant to do it. I joined quilt guilds and also a surface design group. I became very efficient at dying, manipulating, printing and anything else surface related to fabric. I found a world so fabulous that I thought I had died and gone to heaven. I was introduced to art quilting and studied processes to make art quilts. I took all kinds of classes involving regular quilt making and artsy compositions. I still can spout out rules for seam allowances for which kind of piecework you want. Quarter sq triangle, add 1 1/4 inch to a square.

Eventually my DH and I moved to CA. I grew up here so it wasn't a huge shock. We moved to the San Francisco Bay area. 107 miles from the home I grew up in. I still quilted and continued to sell Mary Kay. I was selling quite a bit of Mary Kay but alas my sewing won out. I still sell makeup just not as much as I used to.

During the second year of living here I was introduced to a jewelry designer that lives in my town.http://www.twisted-silver.com/
Because I think in a visual way and artistically I was immediately inspired again about my childhood dream of becoming a fashion designer. While talking to Debbie, she realized I should have her beloved fabric and trims, which she would no longer be using but wanted the right home for it all. I became the right home. I made her a custom, fabulous dress from part of it and also repurposed some clothing items from a second hand store. She was so taken with this dress it has become her favorite. I told her about my dream as a child. She responded that you never know what may happen. In the ensuing months she would tell me that she thought fashion is where she felt it was at for me. Thanks to her encouragement I have gone back to my original love of fashion design. I started sewing apparel again and LOVING it.

Last year I discovered while in a wacky fabric store and overhearing and butting into a conversation that there is a fashion department at a community college. About 35-40 miles way from my home. This woman informed me that it WOULD be worth my drive. (It takes over an hour with traffic in the morning and about 50 minutes without) Living here in CA is great. For only $20 a credit you can attend community college. For under a hundred dollars you can be in a specific class for a semester. That is a no brainer in my book. It costs less than any kind of sewing related daily workshop where the fees run anywhere from $40 to $100+ a day.
I currently am enrolled in a tailoring class. It is so much fun . I feel like a kid on christmas morning.

I also love felting, although I haven't done as much of it as I would like. Speaking of which I went to Exotic Silks after my class on Wednesday to buy lining for my jacket and overheard some ladies talking about felting. One of them had on this wonderful nuno felted vest. I just had to go see it. (I took a class on this several years ago and loved it) It is where you take wool roving and felt it into a sheer fabric to create a wearable felted fabric. Turns out this woman is here from Kansas City giving a workshop today and tomorrow. And get this, they had a space in tomorrow's workshop!!! I wouldn't have been permitted except that today is the learning curve and since I've had some experience they could let me come. They also asked if I was busy that afternoon. I had to get back here to the east bay to get my ds from school. Otherwise you know I would have taken off and gone felting with them. This woman who is doing the workshop is Sharon Kilfoyle. Her website is http://sharonkilfoyle.com/ and the woman who organized the workshop is Lorri Scott her web site is http://lasfibers.com/
I can't wait until tomorrow. 

Tuesday, February 24, 2009

Life flying by

Wow, where do the days go? 
Speaking of life so quickly vanishing before us. Any of you parents out there will acknowledge the quickness in which our little bundles of joy grow into people. Live adult people. So one of my friends is having a new bundle of joy entering their home. Saturday a shower was given. I donated to the group gift but that didn't stop me from deciding the baby needed a handmade gem of a jacket in her wardrobe. Here's the jacket. I decided that even though I am short on time I would like you all to see the jacket complete with a spanish snap buttonhole.